Before you start
SiteSathi AI Connector adds the hosted SiteSathi chatbot to a WordPress site. You need administrator access to WordPress, a SiteSathi account, and control of the WordPress website's domain for ownership verification.
Release status: The connector has been submitted to WordPress.org and is awaiting manual review. Until approved, obtain the beta ZIP directly from the SiteSathi team. A WordPress sandbox can test the settings screen, but it cannot prove ownership of a shared testing hostname.
WordPress may restrict installing third-party plugins depending on hosting or plan. Your WordPress website must have a publicly accessible HTTPS URL for live embedding.
1. Register and verify your domain
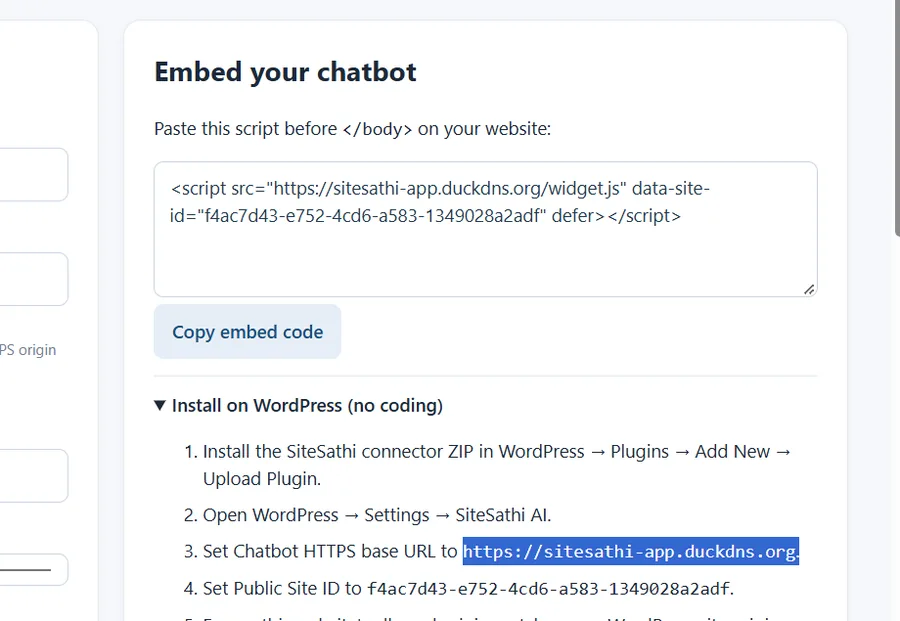
- Open the SiteSathi dashboard, sign in, and create a website entry for your actual WordPress HTTPS origin (for example,
https://shop.example.com). - Open the ownership-verification panel. For your own custom domain, add the exact TXT hostname and value provided by SiteSathi in the DNS zone for that domain.
- Wait for the record to resolve and click Verify in SiteSathi. Do not change the website's allowed origin after verifying unless you intend to repeat verification.
2. Install the connector
- Request the current installer from SiteSathi support while the WordPress.org listing is under review.
- In WordPress Admin, open Plugins → Add New Plugin → Upload Plugin. Select the SiteSathi connector ZIP and choose Install Now, then Activate.
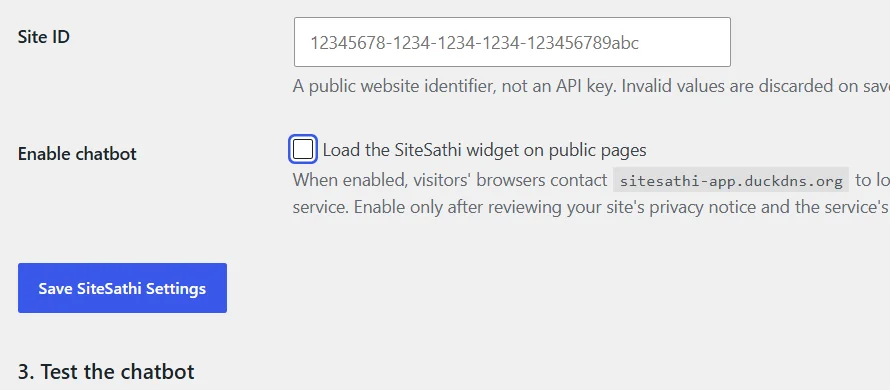
- In Settings → SiteSathi AI, enter the Site ID from your verified WordPress website's embed code. This is the
data-site-idvalue, not an API secret. - Review the privacy policy, update your own site privacy notice, check Enable chatbot, and save.
3. Test the chatbot
- Open your public WordPress website in a private/incognito browser window.
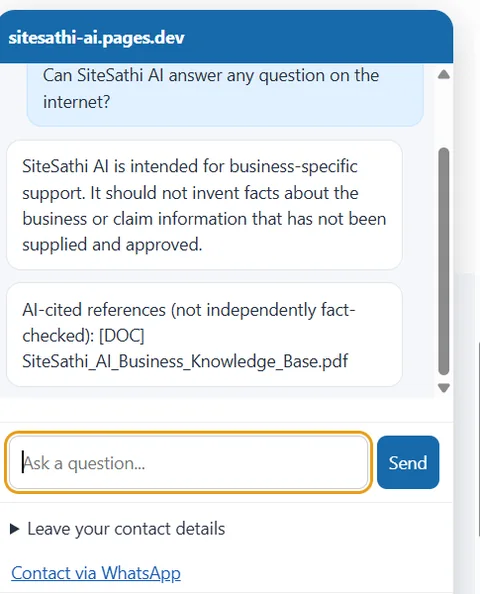
- Open the chatbot and ask a question for which your business has already saved an approved FAQ. Check the answer and its source label.
- Ask an approved document question, then an unknown question. The unknown question should not trigger an invented promise.
- Test mobile layout, lead form, optional human support, and Conversations in the SiteSathi dashboard.
- Temporarily disable the connector in WordPress settings and confirm the widget no longer loads. Re-enable it only after all checks pass.
Common issues
Widget missing on WordPress?
Check that the connector is enabled, your Site ID matches the verified origin, the theme includes WordPress's wp_footer(), and caching, Content Security Policy or browser extensions are not blocking the widget.
403 — website domain not verified?
Confirm the SiteSathi website origin is exactly your WordPress scheme and hostname, then complete DNS ownership verification. A Site ID tied to sitesathi-ai.pages.dev cannot be used on another domain.
Chatbot returns “I don't have a confirmed answer yet”?
Save relevant business FAQs or approved document content in the correct website Knowledge Base. Optional AI is configured in SiteSathi itself, not in WordPress.
Can I use a WordPress sandbox?
Yes, for installation, activation, settings and disable-state tests. A sandbox on a shared hostname does not give you DNS control for the live ownership test.
For more help, see the troubleshooting guide.
Sign in to register your website or contact support to request the WordPress beta connector.